Home Canned Chicken Bone Broth Recipe
Home canned chicken bone broth is simple to make and is packed with nutrients. Dont let the pressure canning scare you.
Home canned chicken bone broth is one of my favorite things to can. It is so convenient to have on my pantry shelf when making soups or rice. Perfect for when your feeling under the weather. My favorite part is knowing that the broth is made with quality ingredients and will nourish my family. I hope this recipe will help you conquer your fear of pressure canning!
Tools You Will Need
- Pressure Canner
- Jar Lifter
- Funnel
- Mason Jars
- Lids and Rings
- Ladle
- Crockpot or Instant Pot

Ingredients
-Chicken Carcass, Chicken Bones, Chicken Feet
-Filtered Water
-Vegetable Scraps
-Seasonings of choice


Step by Step Instructions
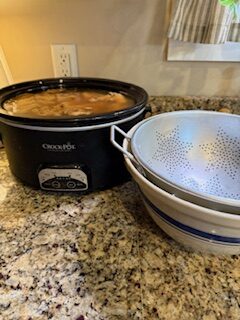
- Start by taking your chicken bones or carcass and place it into a slow cooker or on the stovetop. I prefer to use a crockpot or instant pot on the slow cook setting so it can be left to cook overnight. Add water until the bones are covered. You can add vegetable scraps and spices if you prefer or just leave it plain. (Suggestions in the notes) Slow cook for a minimum of 24 hours. I like strain mine at the 24 hour mark and then refill the slow cooker and make 2 batches with the same bones or chicken scraps.
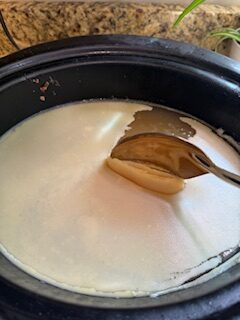
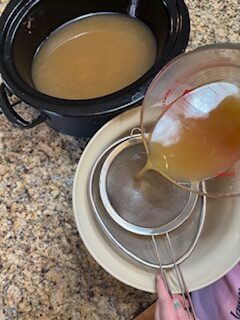
- When straining the chicken broth I use a fine mesh strainer and preferably a cheese cloth on top to ensure I get a clear final product. If I don’t have a cheese cloth I just use 2 fine mesh strainers. You will want to strain your broth and then place it in the fridge until solid. This makes it easy to skim off the fat on top of the broth. You can set this aside and use it in cooking or throw it away.
- Now you must reheat the broth until its liquid and hot enough to add to the hot jars. (Note: If your jars and water are hot so must your product be hot to ensure your jars don’t break from temperature shock. If you want to can something cold then the water, jars and product must all start cold and warm up together in the canner. )
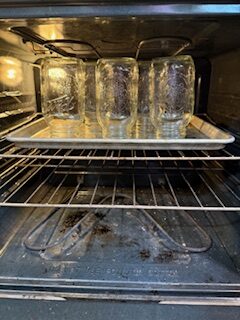
- While your Chicken broth is heating up I like to get my station ready to go for easy canning. Fill your pressure canner with water to the fill line. (Each canner is different and will have instructions on how much water to add it. ) Turn the heat on and warm up water but don’t boil it. Make sure jars are hot by either placing them in a hot water bath, leaving in a hot dishwasher until ready to use or my favorite method is putting them on a baking sheet upside down in the oven on 200 and pulling them out when ready to fill.
- Now take out new lids and rings, Towel or cutting board to place hot jars on, (You never want to put hot jars on a cold counter), Jar lifter, Paper towel and vinegar, ladle, and funnel.
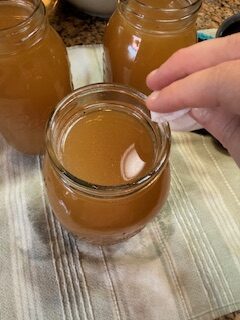
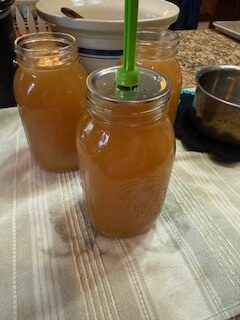
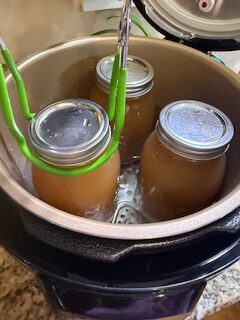
- Place hot jars on clean cloth or board and place funnel inside. Ladle hot chicken bone broth into your jars leaving 1 inch headspace. If you don’t have an exact way of measuring it I like to fill them until the reach the bottom ring around the neck of the jar. Once the jars are filled wipe off rims of the jars using a paper towel or rag with some white vinegar. This makes sure you don’t have any fat left on the rim that might cause them to not seal.
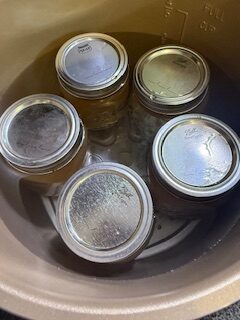
- Place lids and rings on the jars until finger tight. Place them carefully into the pressure canner making sure they are sitting on the rack provided with the canner. Cover with the lid and turn on the heat to high. You must wait until a steady stream of steam is coming out of your valve and then set a timer for 10 minutes. Once the 10 minutes is up place the weight onto the valve so pressure can start to build. (Each canner is a little different so follow your canners instructions) Once Pressure gets to 10lbs you can start your timer (You will need to watch your canner carefully to make sure the canner doesn’t drop below 10lbs pressure. If it does you must start the timer over. You can adjust your burners temperature to keep the pressure level. I usually turn my burner down to medium low or a 4 and it stays right around 10-12lbs pressure.) For pints its 20 minutes and quarts its 25 minutes.
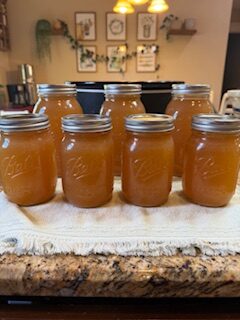
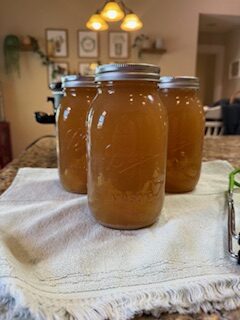
- Once the timer goes off, turn off the heat and leave the canner to come back down to zero pressure. (Don’t move canner, don’t open the lid and don’t take off the weight.) Once canner is at zero pressure you can remove the weight and lid. I like to let mine still sit in the canner for 10-15 minutes. Remove jars and place on kitchen towel or cutting board. Let stand for 24 hours and then remove rings and check the seal. You should be able to lift the jars by your fingertips and the lid stay on. The middle circle on the lid must be indented and not make any noise. If it does just place broth in the fridge and use within the week.
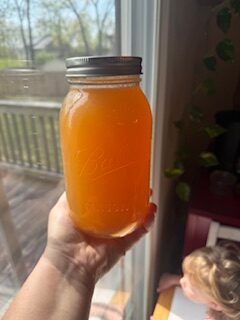
- Home canned broth is shelf stable according to the FDA for up to 18 months but I have used mine after that date and its been fine. Its completely up to your discretion to decide how long to keep canned food for your family.
Notes
1. You can customize your broth to your liking. If you want to add nutrients to the broth I suggest the following: Onion, Carrots, Celery, Peppercorn, Salt to taste, Bay Leaf, Ginger, Turmeric.
2. You can slow cook your broth for as long as you would like. I prefer to at least cook for 24 hours or longer to ensure a good gel in the broth.
3. If you can the broth and keep it at room temperature it wont be solidified like you see online. If you cooked your broth long enough than it should be giggly when refrigerated.
Chicken Bone Broth Canning Recipe
Home canned chicken bone broth is simple to make and is packed with nutrients.
Ingredients
- Chicken Carcass, Chicken Bones, Chicken Feet
- Filtered Water
- Vegetable Scraps
- Seasonings of choice
Instructions
- Start by taking your chicken bones or carcass and place it into a slow cooker or on the stovetop. I prefer to use a crockpot or instant pot on the slow cook setting so it can be left to cook overnight. Add water until the bones are covered. You can add vegetable scraps and spices if you prefer or just leave it plain. (Suggestions in the notes) Slow cook for a minimum of 24 hours. I like strain mine at the 24 hour mark and then refill the slow cooker and make 2 batches with the same bones or chicken scraps.
- When straining the chicken broth I use a fine mesh strainer and preferably a cheese cloth on top to ensure I get a clear final product. If I don't have a cheese cloth I just use 2 fine mesh strainers. You will want to strain your broth and then place it in the fridge until solid. This makes it easy to skim off the fat on top of the broth. You can set this aside and use it in cooking or throw it away. Now you must reheat the broth until its liquid and hot enough to add to the hot jars. (Note: If your jars and water are hot so must your product be hot to ensure your jars don't break from temperature shock. If you want to can something cold then the water, jars and product must all start cold and warm up together in the canner. )
- While your Chicken broth is heating up I like to get my station ready to go for easy canning. Fill your pressure canner with water to the fill line. (Each canner is different and will have instructions on how much water to add it. ) Turn the heat on and warm up water but don't boil it. Make sure jars are hot by either placing them in a hot water bath, leaving in a hot dishwasher until ready to use or my favorite method is putting them on a baking sheet upside down in the oven on 200 and pulling them out when ready to fill.
- Now take out new lids and rings, Towel or cutting board to place hot jars on, (You never want to put hot jars on a cold counter), Jar lifter, Paper towel and vinegar, ladle, and funnel.
- Place hot jars on clean cloth or board and place funnel inside. Ladle hot chicken bone broth into your jars leaving 1 inch headspace. If you don't have an exact way of measuring it I like to fill them until the reach the bottom ring around the neck of the jar. Once the jars are filled wipe off rims of the jars using a paper towel or rag with some white vinegar. This makes sure you don't have any fat left on the rim that might cause them to not seal.
- Place lids and rings on the jars until finger tight. Place them carefully into the pressure canner making sure they are sitting on the rack provided with the canner. Cover with the lid and turn on the heat to high. You must wait until a steady stream of steam is coming out of your valve and then set a timer for 10 minutes. Once the 10 minutes is up place the weight onto the valve so pressure can start to build. (Each canner is a little different so follow your canners instructions) Once Pressure gets to 10lbs you can start your timer (You will need to watch your canner carefully to make sure the canner doesn't drop below 10lbs pressure. If it does you must start the timer over. You can adjust your burners temperature to keep the pressure level. I usually turn my burner down to medium low or a 4 and it stays right around 10-12lbs pressure.) For pints its 20 minutes and quarts its 25 minutes.
- Once the timer goes off, turn off the heat and leave the canner to come back down to zero pressure. (Don't move canner, don't open the lid and don't take off the weight.) Once canner is at zero pressure you can remove the weight and lid. I like to let mine still sit in the canner for 10-15 minutes. Remove jars and place on kitchen towel or cutting board. Let stand for 24 hours and then remove rings and check the seal. You should be able to lift the jars by your fingertips and the lid stay on. The middle circle on the lid must be indented and not make any noise. If it does just place broth in the fridge and use within the week.
- Home canned broth is shelf stable according to the FDA for up to 18 months but I have used mine after that date and its been fine. Its completely up to your discretion to decide how long to keep canned food for your family.
Notes
1. You can customize your broth to your liking. If you want to add nutrients to the broth I suggest the following: Onion, Carrots, Celery, Peppercorn, Salt to taste, Bay Leaf, Ginger, Turmeric.
2. You can slow cook your broth for as long as you would like. I prefer to at least cook for 24 hours or longer to ensure a good gel in the broth.
3. If you can the broth and keep it at room temperature it wont be solidified like you see online. If you cooked your broth long enough than it should be giggly when refrigerated.